So, after months of experimentation, and half a dozen or so diaper cover designs, I've come to a final design that I'm really happy with. It's not so much a specific PATTERN that I like as these techniques will work with MOST of the patterns in my pattern stash. It's the functional elements that I love. So, lets have a look at what I've got:
Sorry I sound all breathy. I accidentally spent an hour and a half listening to JVC after Moodles switched the channel and I was too busy sewing to find where she put the remote and go back to NCIS.
What does this design have that I like? Leg gussets, and front and back slide/splash guards, a wipeable PUL interior, but very little of the rubberized side of the fabric is in contact with the baby's skin, AND front and back elastic to guard against poor fit and poo-splosions.
So lets talk about what I did. (I learned these tricks from other ladies. I just figured out a method of combining all these features that works for me.) First I cut out my pieces. I have 1 piece of black flannel cut to the actual shape of the diaper, and 1 large piece of PUL that is traced on the fold, but instead of putting the pattern piece directly against the fold, I put it 2" from the fold, thus giving me 4" of extra PUL for the middle of the diaper. This extra PUL will be used to form the leg gussets. Here I've overlaid my flannel normal sized piece on top of the PUL piece so you can see the extra width I'm talking about.

I also cut pieces of PUL in the NORMAL PATTERN SIZE that duplicat the FRONT and BACK of the diaper to form the splash guards. Here is a picture of all my pieces cut out. You can see those extra front and back pieces in the picture. These extra pieces also provide stiffness in the waistband, and substance for the snaps to grab onto.
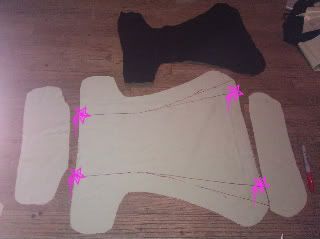
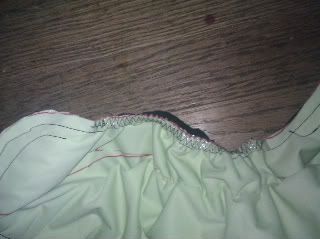
Also in the above picture, you can see that I drew in the elastic lines for the gussets. Normally, I just go 2" from the outside edge of the PUL, but because this pattern (Tighty Whitey Hipster) is hip snapping, my original lines wouldn't work once the gussets were in place... They'd end up interfering with snap placement. So I re-drew my lines, and the ones I used are the ones with fuscha stars on them. The next step was to 3-step zigzag my lastin down along the drawn lines with the lastin and the stitching on the OUTSIDE EDGE of each line. I did my sewing on the non-shiny side of the PUL, since I want the shiny side to be toward the baby for this part. (Remember to stretch the lastin as you sew!) Then, I folded along the lines, I sandwiched the lastin between layers of PUL, and added 1 line of straight stitching along the outside edge of the lastin (not sewing through it) on the shiny side of the PUL. Doing the leg gussets with one straight seam here, will reduce the number of needle punctures through the PUL in the wet zone.
Next, I pinned the extra front and back splash guards to the body of the PUL, shiny sides together. The leg gussets become 1" deep pleats at this point, and I fold the tops of each gusset ridge toward the center of the diaper. Then I stitch the splash guards down with DOUBLE the seam allowance I was using previously. (So if I was using a 1/2" seam allowance before, I do these seams at 1".) This will "seal up" your wet zone like a dam so that other seams that go through the cotton layer won't wick.
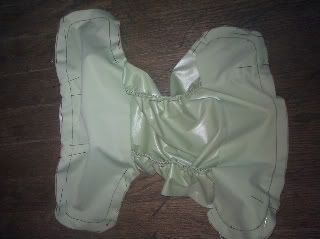
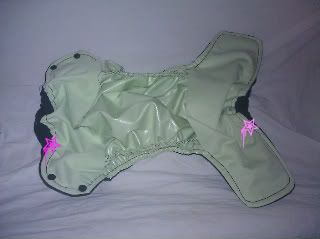
Then, going back to the normal seam allowance, I sew the cotton flannel to the diaper PUL, right sides facing together. The view you see of the PUL in the above picture is the RIGHT SIDE of the PUL part of the diaper. The pink arrow shows the space I left in the seam to turn the diaper right side out after I add my elastic. In this view you can also see how the leg gussets are pleated toward the middle at the front and back of the diaper.
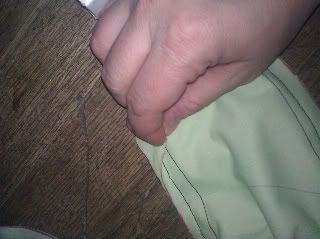
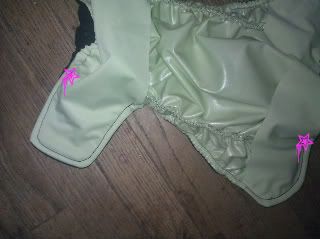
Here is a close up of the two previous seams. You can see how the "dam seam" is toward the inside, and the seam that goes through the cotton fabric is now outside the "wet zone."
The next step is to sew my lastin to both leg seams, and the back and front stretch zones. I 3-step zig-zag my lastin to the PUL side of the seam allowance, and this causes the elastic to roll IN toward the baby.
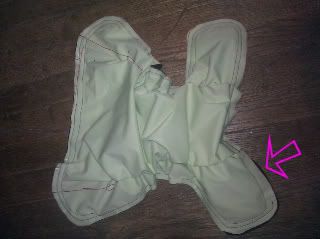
Then I turn and top stitch my diaper. I top stitch from pink star, to pink star in this picture, along the leg seam. Make sure you don't sew through your lastin! In the places where I was sewing along the previously made double width "dam seam," I sewed right through the same line, because I was NOT sewing in the wet zone. I do not top stitch the front and back elastics, because they are in the wet zone. As long as you top stitch the wings on either side, this seam will still look tidy, and if you sewed your lastin to the PUL side of the seam allowance, the seam will roll in.
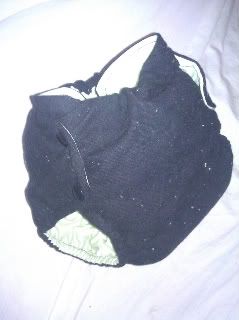
Then I added my snaps. Since there is a nice PUL splash guard, and I'm not putting my snaps in the wet zone, I can do all my snaps LAST and still have "hidden snaps." I just reach up under the splash guard on the front of the diaper to place my hidden snaps, and the hip snaps in the back go through all layers of fabric.
TADA!
0 comments:
Post a Comment